The One-Adjustment Rule: Fixing a Block Once Instead of Every Muslin
Instead of chasing fit issues garment by garment, this note walks through correcting the block itself, once, so every piece cut from it after starts from true.
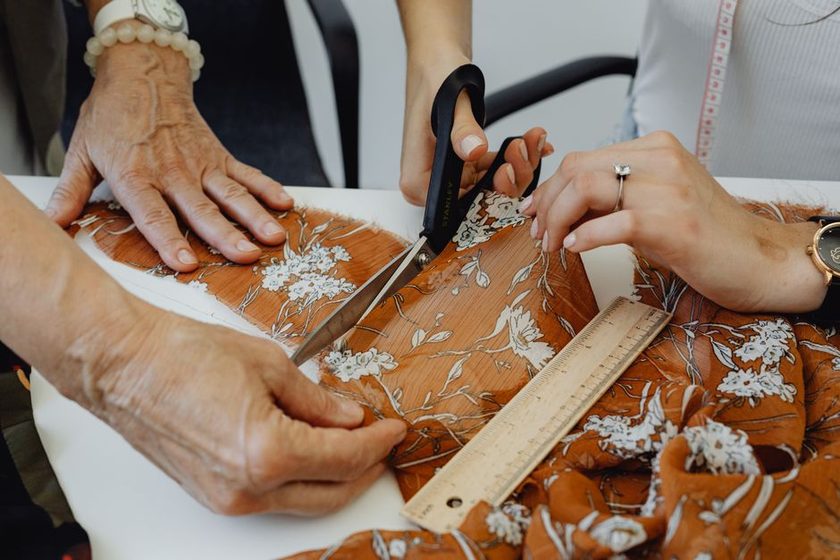
There is a small ritual that shows up in a lot of sewing rooms, mine included. You cut the muslin, you baste it, you put it on, and within ten seconds you are pinching out the same wedge of fabric at the back neck that you pinched out of the last three things you made. You unpick, you redraw, you cut again. The garment ends up fine. Then you fold the pattern, put it in the envelope, and start the next project from the same uncorrected paper — which means you will do the whole thing again in a month. The alteration is not the problem. The repetition is.
The tell: you can draw the fix from memory
A one-off fitting problem feels like discovery. You look at the drag line, you turn the mirror, you think about it, you try something, you try something else. A recurring problem feels like nothing at all — your hand already knows where the pin goes. That flatness is the diagnostic. When a correction has stopped requiring thought, it is no longer a response to this garment; it is a description of your body that your block does not contain yet.
The most common ones I hear about are unglamorous. A back neckline that gapes by roughly the width of a thumb. A shoulder seam that creeps forward over the course of a day. A waistline that sits true at center front and rides up at center back. None of these are exotic. All of them are permanent facts about a particular set of shoulders, and none of them belongs in a project-by-project fix list.
The three-garment rule
Before you touch the master, check that the same complaint has appeared in three different garments made from three different fabrics. Not three copies of the same shirt. A woven shirt, a lined jacket, a simple shift — different weights, different drapes, different grain behaviour. If the issue survives all three, it is structural and belongs in the block. If it showed up once, in one cloth, it probably belongs to that cloth.
Three is arbitrary as a number, but it does useful work: it is enough repetition to rule out a bad cutting day, and few enough projects that you are not sewing your way through a year before acting.
Fabric behaviour that impersonates a fit problem
Not every wrinkle is an argument for redrawing anything. Cloth misbehaves in ways that look exactly like poor drafting until you name them. A loosely woven linen relaxes on the bias and the side seam swings forward — that is not a hip curve error. A stable ponte holds a shape your block never promised, so the ease you drafted for a woven reads as excess. A brushed cotton that came off the bolt slightly off-grain will twist at the sleeve no matter how correct your armhole is.
The sorting question is simple: would this complaint survive a change of fabric? If you cannot answer, you do not have three garments yet. Keep sewing and keep notes. It also pays to be honest about cutting: a piece laid slightly off the straight grain produces a very convincing fake fitting problem, and it is worth ruling that out before you cut into a master you have spent months trusting.
| What you observe | Likely structural | Likely one-off |
|---|---|---|
| Gaping at back neck | Appears in stable cottons, wools and linens alike; same width every time | Appears only in a loosely woven cloth that stretched while basting |
| Diagonal pull from armhole to bust | Same angle across several garments regardless of sleeve style | Shows up once in a fabric cut slightly off grain |
| Waist seam rising at center back | Present in skirts and dresses; measured difference is consistent | Present only after the fabric relaxed on a bias-cut panel |
| Sleeve feels tight lifting the arm | Repeats even when you change sleeve draft and cap height | Traceable to a firm interfacing or a heavily eased cap in one make |
| Hem dips at side seams | Repeats in wovens of different weights, same amount each time | A single drapey rayon that grew hanging overnight |
Transferring the change to the master
Once a complaint has cleared the three-garment test, the work is mechanical and should be done in one sitting, while the muslin is still on the table and the reasoning is still fresh. The muslin is evidence, not a draft — it holds the measurement, and your job is to move that measurement onto the piece everything else descends from.
- Mark the change on the muslin, not on paper. Pin out the excess, then rule a line in a colored pencil directly on the cloth, with an arrow showing which way the seam travelled. Write the amount next to it. If you took out a wedge, mark both ends, because a tapered change is easy to misremember as a parallel one.
- Measure the correction flat. Unpin, press the muslin, and measure the marked line against the original seam line with a ruler on a flat surface. Measuring the correction while the muslin is still on the body is how a half-inch becomes three-eighths by the time it reaches paper.
- Redraw on a copy of the master first. Trace the affected piece, apply the change to the tracing, and check that everything still walks — seam lengths matching their partners, notches still aligned, dart legs the same length. This is the moment to confirm you have not quietly shortened an armhole by a quarter inch.
- Move it to the master and true the neighbours. A change to a back piece almost always asks something of the front. Adjust both, then re-walk the seams. A block whose pieces no longer match is worse than a block that fits imperfectly, because the error propagates silently into every project.
- Date the master and write the reason on it. In the margin: what changed, how much, and why — “back neck, 3/8 in wedge removed, gaped in three garments incl. wool crepe, Feb 2026.” The number without the reason is a mystery you will not solve in a year.
- Retire the old copy immediately. Mark it superseded across the face, note the date it was replaced, and move it out of the working drawer. Do not throw it away yet; do not leave it where a rushed hand can grab it.
A block is not a pattern you keep. It is a record of decisions you can still read six months later, and the reason matters more than the measurement.
Why the reason outlives the number
Suppose you find, next winter, that the back neck now gapes slightly in the other direction — too tight. Without a note, you are guessing whether the earlier wedge was too generous or whether something else changed. With a note, you can see that the wedge was based on three garments in medium-weight wovens, and you can ask a better question: has my posture changed, or was that sample set too narrow?
Reasons also protect you from stacking corrections. A block that has been adjusted five times without documentation becomes a shape nobody can account for, and when it finally goes wrong the only honest option is to redraft from measurements. That is a real cost. A brief line in the margin usually prevents it. This is also where the choice of medium starts to matter — a paper master takes pencil notes gracefully and dies of handling, while a cloth sloper survives use but resists annotation, a tradeoff worth thinking through in paper block or cloth sloper.
What belongs in the block and what does not
Not every recurring preference is a block correction. The block should carry your body; style decisions ride on top of it. A useful split:
- Goes in the block: shoulder slope, back length, neck circumference, waist position, the depth and angle of shaping darts, girth at the fullest points.
- Stays in the project: ease for a particular silhouette, neckline shape, hem length, pocket placement, how much wearing room you want in that jacket specifically.
- Ambiguous, decide once and write it down: sleeve cap height, the amount of ease you prefer through the upper arm, whether you draft with or without a seam allowance included.
Where the measurements themselves came from matters as much as what you do with them — a block built from numbers taken over a bare torso will keep producing “recurring” complaints that are really just missing ease, which is the argument in measuring over the clothes you actually wear. Fix that first, or you will version a master that was never true to begin with.
A closing note
This is a working method from a home sewing room, written for people drafting their own patterns for their own use. Bodies, fabrics and tolerances differ, and so do the conventions taught in different drafting traditions. Treat any workflow here as a starting point to test against your own muslins rather than a rule; nothing on this page is professional fitting instruction, and no outcome is promised.